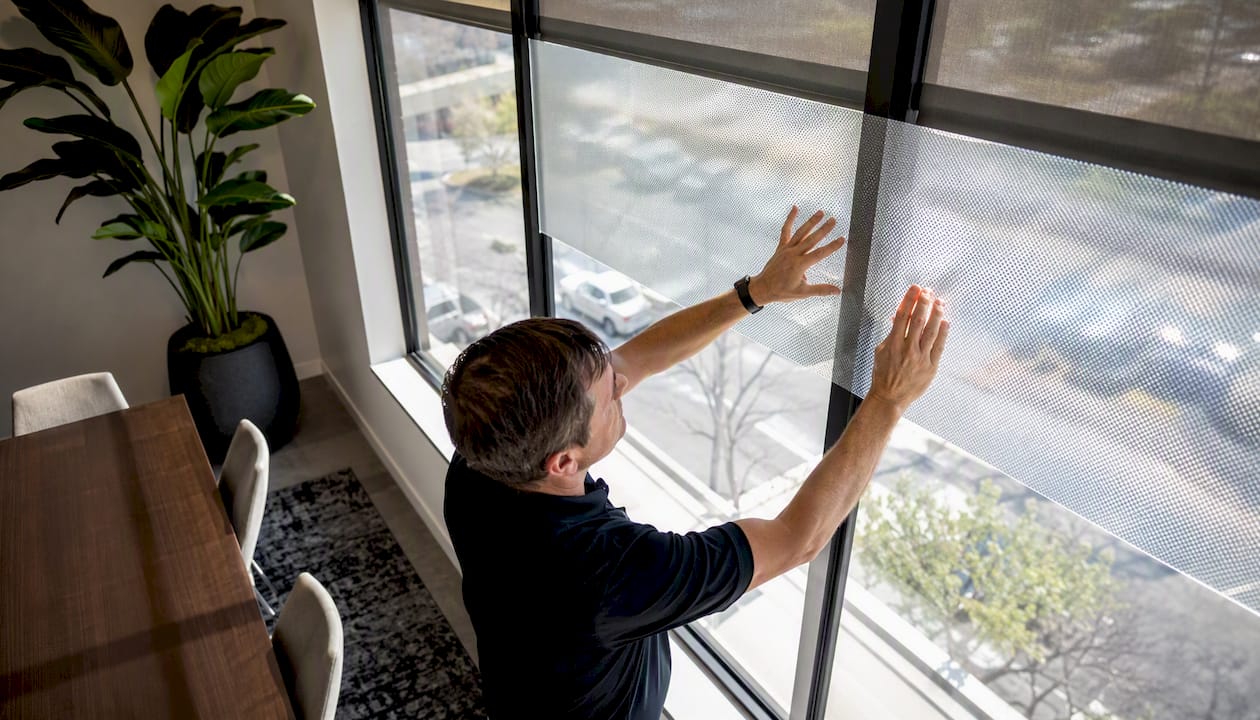
Daylight Redirecting Film: A Technical Guide for Buildings
Daylight redirecting film (DRF) is a micro-structured optical film applied to the upper portion of a window that refracts or reflects incoming sunlight upward toward the ceiling, pushing natural light deeper into a room rather than simply blocking or tinting it. The clearest use case: retrofit the upper one to two feet of glazing in a deep-plan office, classroom, or retail space where daylight barely reaches past the perimeter.
DRF is likely a good fit if you recognize any of these signals:
- Rooms extend a significant distance from the window wall, leaving the interior chronically dim
- Occupants near windows complain of glare while those farther back rely entirely on electric lighting
- You want to reduce daytime lighting hours without a full daylighting redesign
Key Takeaways
Daylight redirecting film is a retrofit optical solution that extends natural light deeper into a room by steering incoming sunlight toward the ceiling rather than blocking it.
| Point | Details |
|---|---|
| Best use case | Deep-plan offices, classrooms, and retail spaces where interior zones rely on electric lighting during the day |
| Placement rule | Install in the upper window zone only; never at eye level |
| Performance depends on | Ceiling reflectance, room depth, sun angle, and whether daylight-linked lighting controls are in place |
| Combine with solar control | Pair DRF on upper glazing with solar-control or low-e film on lower glazing to manage both daylighting and heat gain |
| Tintadvantage | Provides site surveys, orientation evaluation, and professional DRF installation across Nebraska and Iowa |
Table of Contents
- How daylight redirecting film works: the optics in plain terms
- What DRF is made from and the main types available
- Real benefits and honest limitations
- Where DRF works best and how to place it
- Expected daylighting performance and energy impacts
- Installation, lifespan, and troubleshooting
- Typical costs and how to think about ROI
- Combining DRF with other films and daylighting strategies
- When professional installation is the right call
- DRF deserves more credit than it usually gets
- Tintadvantage offers professional DRF assessment and installation
- Sources
How daylight redirecting film works: the optics in plain terms
DRF does not dim light. It steers it. That distinction matters because the mechanism determines both where you install it and what you can realistically expect.
Two optical approaches exist. The first uses prism-shaped microstructures formed into the film surface: incoming light refracts through the prism geometry and exits at a steeper upward angle, aimed at the ceiling. The second uses slit or void structures that rely on total internal reflection (TIR) to bounce light upward. According to Wikipedia’s entry on daylight redirecting window film, slit-based films tend to be more visually transparent but redirect light most effectively when the sun is relatively high; prism-based films offer finer control over the outgoing beam angle across a wider range of incidence angles.
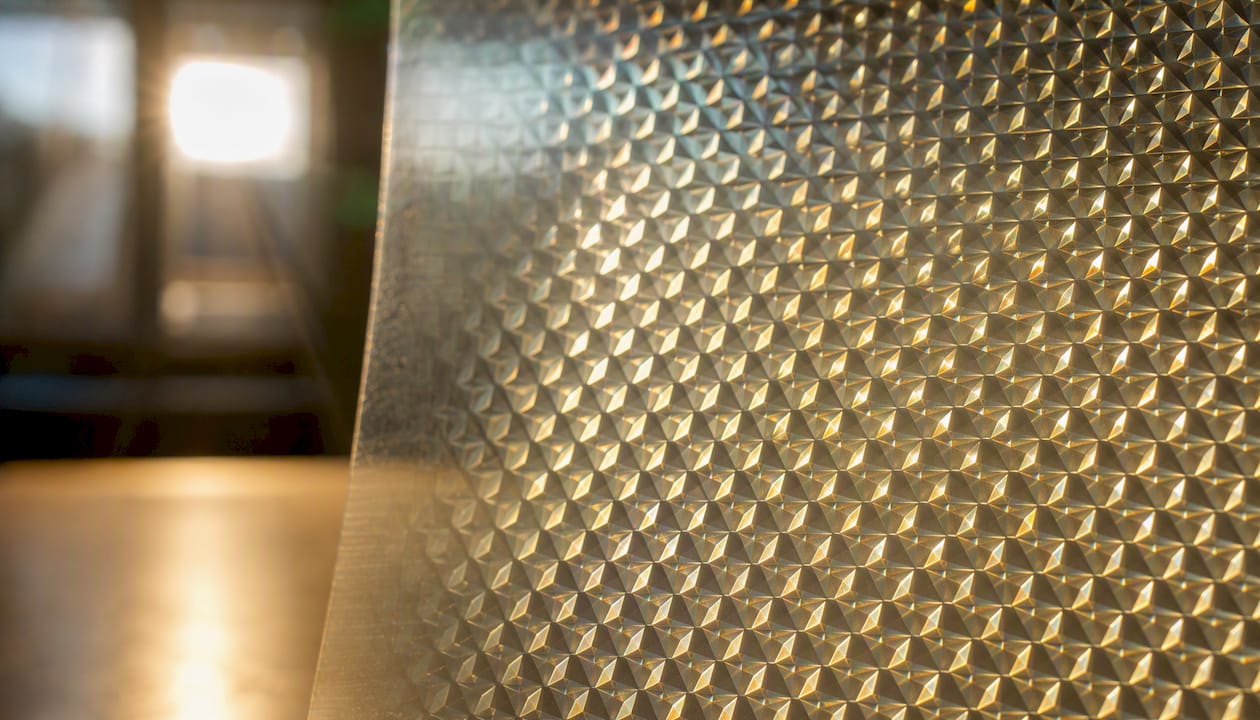
Angle sensitivity is the central performance variable. As the sun’s altitude changes through the day and across seasons, the incidence angle shifts, and the film’s redirect efficiency changes with it. Technical analysis of optical steering devices confirms that redistributing light from high-illuminance zones near the window to darker interior zones improves perceived brightness, but the degree of improvement tracks closely with how well the film’s prism prescription matches the local sun path.
Practical effects to keep in mind:
- Glare near the window is reduced because direct beam light is redirected upward rather than entering at eye level
- Daylight penetration can extend significantly deeper into the room, brightening areas that previously needed electric lighting during the day
- Performance drops on overcast days and at low sun angles (early morning, late afternoon, winter months at northern latitudes)
Pro Tip: If your building sits between 35° and 50° north latitude, ask your installer to specify a prism prescription optimized for your average solar altitude at noon in winter, when the sun is lowest and redirect efficiency is most challenged.
What DRF is made from and the main types available
The standard construction is acrylic micro-structures formed on a flexible polyester backing, with a pressure-sensitive adhesive on the glazing side. The acrylic layer carries the optical geometry; the polyester provides dimensional stability and allows the film to be handled and applied like conventional window film.
Two product families dominate:
- Prism-microreplicated films: The prism geometry is embossed or cast directly into the acrylic surface. These offer precise beam control and work across a broader range of incidence angles, but the surface texture can create a slightly hazy appearance at certain viewing angles.
- Slit/TIR-based films: Thin air gaps or voids within the film structure create total internal reflection. These films are generally clearer in appearance and less visually intrusive, but their redirect performance is more tightly coupled to sun altitude.
Product evolution has moved toward integrated single-film assemblies that combine the redirecting layer with a diffusing layer, replacing earlier two-film stacks. The diffuser softens the redirected beam so it spreads more evenly across the ceiling rather than creating a bright stripe.
Pro Tip: Check the film’s orientation markings before cutting. DRF is directional: installing it upside down or rotated 90 degrees sends light downward or sideways, not toward the ceiling. Most manufacturers print an arrow or “this side up” indicator on the liner.
Real benefits and honest limitations
The core benefit is redistribution, not just reduction. Prism lighting systems move daylight from the bright perimeter zone to the darker interior, which can meaningfully reduce the hours electric lighting is needed in the back half of a room.
Primary benefits:
- Deeper daylight penetration into the room interior
- Reduced direct glare at seated eye level near the window
- Potential reduction in daytime electric lighting load
- No structural modification to the building envelope
Limitations are real and worth stating plainly:
- Angle sensitivity means performance varies by season, time of day, and building orientation
- DRF provides minimal thermal control; it does not meaningfully reduce solar heat gain on its own
- Near-window over-illumination can occur if the redirected beam hits a low ceiling close to the glass
- Incorrect orientation during installation reverses the optical effect entirely
- Overlaying opaque shades or blinds on top of DRF defeats its purpose
Statistic callout: Industry and academic sources consistently note that lighting-energy savings from redirected daylight vary substantially with room geometry, ceiling reflectance, and whether lighting controls (occupancy sensors, daylight sensors) are integrated. Savings are real but not uniform across building types.
Where DRF works best and how to place it
DRF performs best in spaces where the room is deep relative to the window height, the ceiling is light-colored and reflective, and occupants spend time in the interior zone away from the glass. Deep-plan offices, school classrooms, retail storefronts, and spaces with clerestory glazing are especially strong candidates. For storefront applications, DRF on upper glazing can extend natural light into merchandise display areas that would otherwise need supplemental lighting all day.
Placement rules:
- Install DRF in the upper portion of the window only, typically the top one to two feet of glazing or the upper 20–30% of window height
- Never install at seated eye level; light redirected at eye height creates glare rather than eliminating it
- South-facing windows in the northern hemisphere receive the most consistent high-angle sun and generally produce the best results
- North-facing windows receive diffuse sky light rather than direct beam, limiting redirect effectiveness
- East and west orientations work but require attention to low morning and afternoon sun angles
Pre-install site assessment checklist:
- Measure room depth from the window wall to the farthest occupied workstation
- Note ceiling height and surface reflectance (light matte finishes reflect redirected light most effectively)
- Identify existing shading devices and whether they will conflict with the DRF zone
- Record window orientation (compass bearing) and any external obstructions that shade the glazing
Expected daylighting performance and energy impacts
Vendor-reported figures for DRF typically describe the percentage of incoming daylight redirected toward the ceiling rather than transmitted straight through. Performance depends heavily on sun angle, ceiling reflectance, and room geometry, so treat published figures as upper-bound estimates under favorable conditions.
Academic and industry analysis confirms that lighting-energy savings vary substantially with geometry and controls integration. A room with a high-reflectance ceiling, significant depth, and daylight-linked dimming controls will see larger savings than a shallow room with a dark ceiling and no controls.
| Performance variable | Typical range or condition |
|---|---|
| Daylight penetration depth | Extends noticeably beyond the window perimeter zone into mid-room |
| Ceiling reflectance needed | high ceiling reflectance for effective light distribution |
| Lighting energy savings | Varies substantially; controls integration is required for measurable savings |
| Optimal sun altitude | Mid-range angles above horizon for most prism prescriptions |
Pro Tip: Take lux readings at three points (near window, mid-room, far wall) before and after installation, at the same time of day under similar sky conditions. A simple lux meter costs under $30 and gives you a defensible before/after comparison to share with building management.
Installation, lifespan, and troubleshooting
Professional installation is the right call for most commercial projects. The film’s orientation sensitivity and the need for precise placement in the upper window zone leave little margin for error, and a misapplied film is not just ineffective but can actively cause glare.
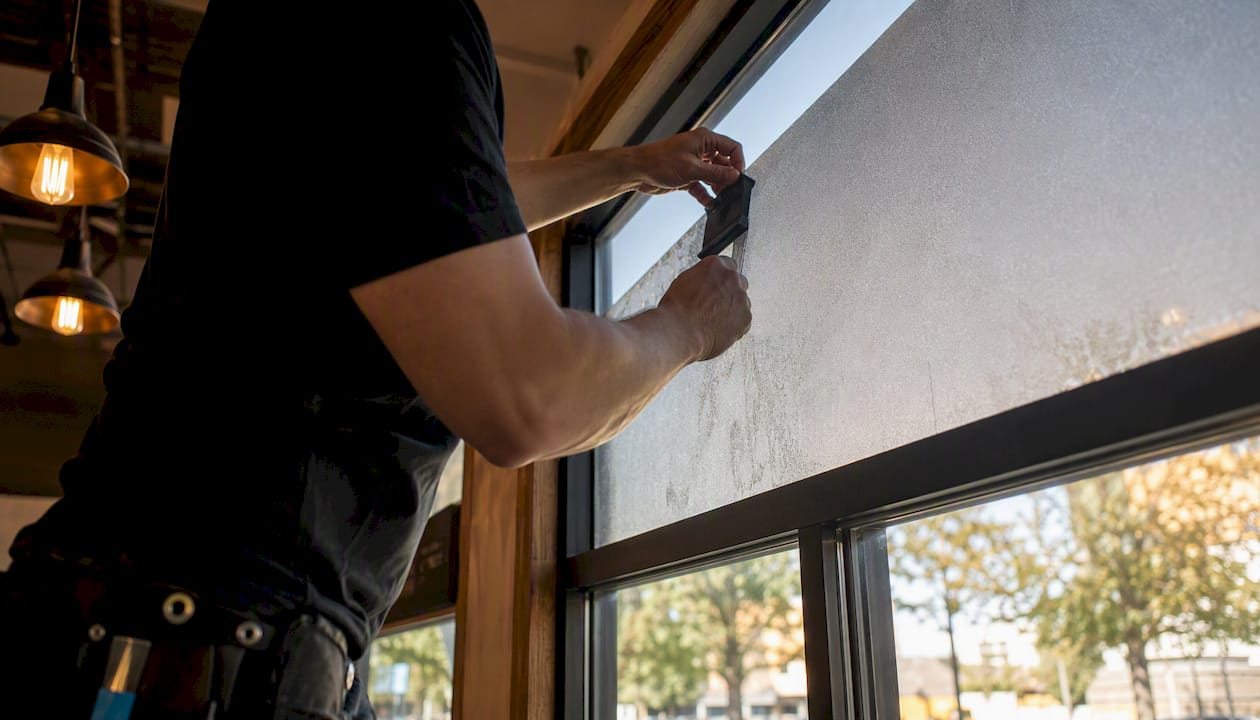
Application best practices include installing in the upper window zone with correct orientation markings verified before cutting, applying with a slip solution at temperatures between 40°F and 100°F, using a hard squeegee to eliminate solution and air pockets, and sealing edges to prevent moisture intrusion and lifting.
Common post-install issues and fixes:
- Bubbling in the first days: Normal during the adhesive cure period (typically 7–30 days depending on temperature and humidity); most bubbles dissipate as moisture escapes
- Persistent adhesion failure at edges: Usually caused by contaminated glass or application outside the recommended temperature range; requires removal and reapplication
- Optical distortion or banding: Often indicates the film was applied with wrinkles or the prism orientation is inconsistent; inspect under direct light and reapply if necessary
- Glare complaints post-install: Check that the film is installed in the upper zone only and that the redirected beam is not hitting a low ceiling or light-colored wall directly in front of seated occupants
Lifespan for quality DRF products runs 10–15 years under normal conditions. UV exposure and thermal cycling (wide temperature swings between seasons) are the primary degradation factors. Cleaning with a soft cloth and mild soap solution is sufficient; avoid abrasive pads that scratch the acrylic surface.
Plan for a short installation period on most single-floor commercial spaces, with adhesive cure taking several weeks before the final optical appearance stabilizes.
Typical costs and how to think about ROI
Cost drivers for a DRF retrofit include film type (prism vs. slit/TIR, with or without integrated diffuser), total square footage of the upper window zone, labor for precise placement and edge sealing, and any site prep such as cleaning or removing existing film. For a detailed breakdown of commercial window film pricing, the variables stack quickly on larger projects.
ROI depends on three factors: how many hours of electric lighting the DRF actually displaces, whether daylight-linked controls are in place to capture those savings, and local utility rates. Without occupancy or daylight sensors, electric lights often stay on even when DRF is delivering adequate natural light, which eliminates most of the energy payback. Check with your local utility for any demand-response or efficiency incentive programs that apply to daylighting retrofits.
Items to gather before requesting an installer quote:
- Window dimensions and orientation for each zone where DRF is planned
- Room depth and ceiling height for each space
- Ceiling surface color and approximate reflectance
- Existing shading devices (type, motorized or manual)
- Current electric lighting type and control system
- Any existing window film that would need removal
Combining DRF with other films and daylighting strategies
DRF works best as one layer in a coordinated strategy. On its own, it redirects light but does not manage heat gain or provide privacy. The standard combination pairs DRF on the upper window zone with a solar-control or low-e film on the lower glazing, which handles thermal gain and glare from the view portion of the window while DRF handles daylighting above.
Effective combination patterns:
- DRF upper + solar control lower: Addresses both daylighting depth and thermal gain in a single window assembly
- DRF + integrated diffuser layer: Softens the redirected beam for more even ceiling illumination, reducing bright-stripe artifacts
- DRF + automated shading: Motorized shades below the DRF zone can manage low-angle sun without interfering with the redirected beam above
Design rules to avoid interference: do not install motorized shades that cover the DRF zone when deployed, and do not apply tinted or reflective films on top of DRF, which disrupts the optical geometry.
Pro Tip: Coordinate DRF installation with your lighting control system commissioning. If daylight sensors are set to dim or switch off fixtures when lux at the sensor reaches a threshold, position the sensor in the mid-room zone where DRF is delivering light, not near the window where it was already bright before installation.
When professional installation is the right call
For any commercial project, complex glazing geometry, or situation where warranty and predictable optical outcomes matter, hire a certified installer. DIY application of DRF is technically possible on small residential windows, but the margin for orientation error and the precision required for edge sealing make professional installation the lower-risk path.
Conditions that should drive hiring a professional:
- Multi-pane or laminated glazing where adhesion compatibility needs verification
- Windows above the first floor requiring lifts or scaffolding
- Projects where DRF is being coordinated with building automation or lighting controls
- Any installation where a manufacturer warranty is expected
- Commercial spaces with occupant health and safety obligations
Questions to ask a prospective installer:
- Have you installed DRF specifically, or only conventional solar-control films?
- How do you verify orientation before cutting and applying?
- What edge sealing method do you use, and does it affect the warranty?
- What is the expected cure period before the final appearance stabilizes?
- Can you provide references or photos from similar building types?
Pro Tip: Ask for photos of completed DRF installations taken from inside the room at mid-day. A well-installed film should show a bright ceiling band and noticeably reduced glare at the window, with no visible banding or distortion in the film itself.
DRF deserves more credit than it usually gets
Most building owners evaluating window films focus on heat rejection and privacy, which are legitimate priorities. DRF addresses a different problem: the uneven distribution of daylight that leaves perimeter zones over-lit and interior zones chronically dim. That imbalance is responsible for a significant share of unnecessary daytime electric lighting in commercial buildings, and DRF is one of the few retrofit options that addresses it without structural changes.
The caveat is that DRF is not a standalone solution. Applied without attention to ceiling reflectance, room geometry, and lighting controls, it delivers a fraction of its potential. Applied as part of a coordinated strategy, it can meaningfully shift the balance between natural and electric light in spaces where that shift has real operating cost implications.
If your building matches the signals in the opening of this article, a site assessment is the logical next step, not a purchase decision.
Tintadvantage offers professional DRF assessment and installation
Getting DRF right means more than ordering film online. The geometry evaluation, orientation specification, and coordination with existing films or shading systems are where most retrofit projects succeed or fall short.

Tintadvantage provides site surveys, window orientation analysis, and professional installation of DRF and complementary solar-control films for commercial and residential properties across Nebraska and Iowa. The team evaluates room depth, ceiling reflectance, glazing orientation, and existing shading before recommending a film combination, so you get a specification that matches your building rather than a generic product suggestion. Post-install verification is included. To schedule a site assessment or get a quote, visit Tintadvantage and connect with the installation team directly.