
Glare Reduction Window Film: Your Practical Buying Guide
The fastest way to cut screen-reflective glare without blacking out your windows is a professionally selected ceramic or multi-layer glare reduction window film installed by a qualified technician. These films can reduce glare significantly while preserving natural daylight, which is something blinds and curtains simply cannot do. When comparing options, focus on two numbers: visible light transmission (VLT) and total solar energy rejection (TSER). Lower VLT means less light passes through; higher TSER means more heat stays outside.
Quick wins before you call an installer:
- Identify your worst-facing windows (south and west exposures get the most direct sun)
- Note whether your primary problem is screen glare, heat, or both
- Check whether your windows are single-pane, double-pane (IGU), or have existing low-e coatings
- Decide your daylight priority: do you want a bright room or are you willing to trade some light for stronger glare control?
Pro Tip: Book a consultation with Tintadvantage before buying any film. An on-site light assessment tells you the exact VLT and TSER you need per window, so you do not end up with a film that is either too dark or too weak.
Table of Contents
- How does glare-reduction window film actually work?
- What type of anti-glare window film should you choose?
- Which specs matter most on a window film quote?
- How do you pick the right film for your room and window orientation?
- DIY film or professional installation: which one is right for you?
- Real results from Omaha Window Tinting
- How to care for your window film after installation
- What does professional installation typically cost?
- What are the real drawbacks of window film?
- Does window film work on all glass types?
- Energy savings that go beyond glare control
- Key Takeaways
- Why I always recommend starting with the window, not the film
- Tintadvantage can assess your windows and install the right film
- Useful sources and further reading
How does glare-reduction window film actually work?
Window film controls glare through three distinct mechanisms, and understanding them helps you spot the difference between a film that genuinely works and one that just darkens your room.
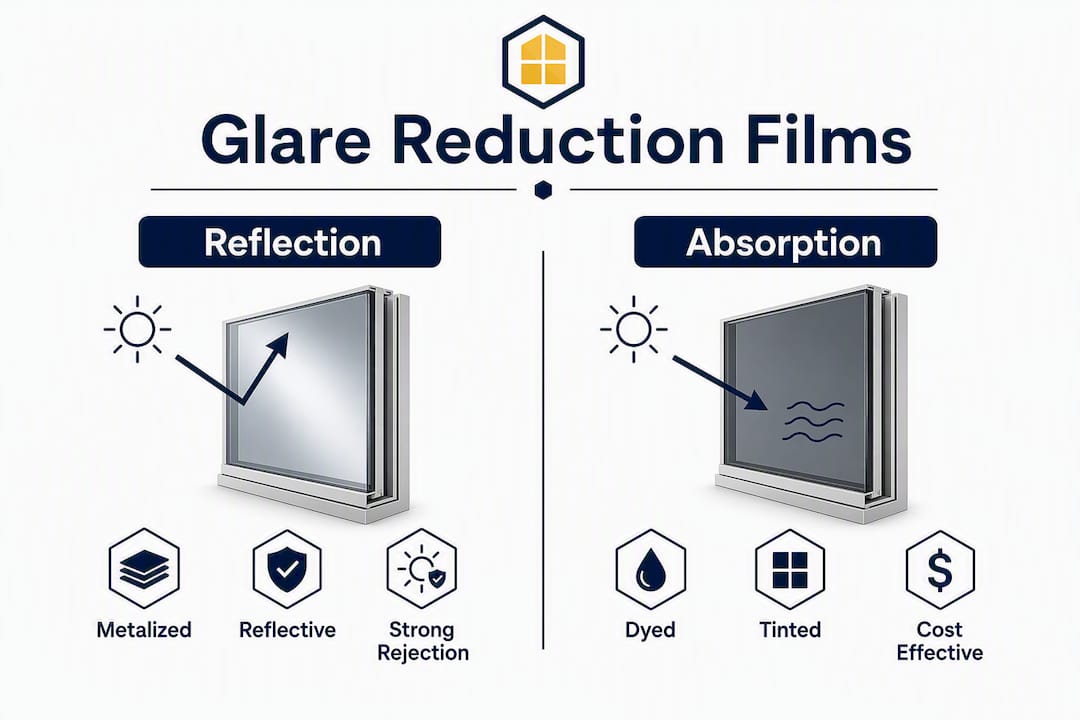
Reflection is what metalized coatings do. A thin metallic layer bounces incoming light away from the glass surface before it enters the room. This is effective for heat and glare, but it gives windows a mirror-like exterior appearance, which some homeowners and HOAs dislike.
Absorption is the dye or tint layer approach. The film absorbs solar energy rather than reflecting it, which reduces brightness inside. The trade-off is real: heavy tinting cuts glare but also cuts daylight, and in low-light conditions the room can feel noticeably dim.
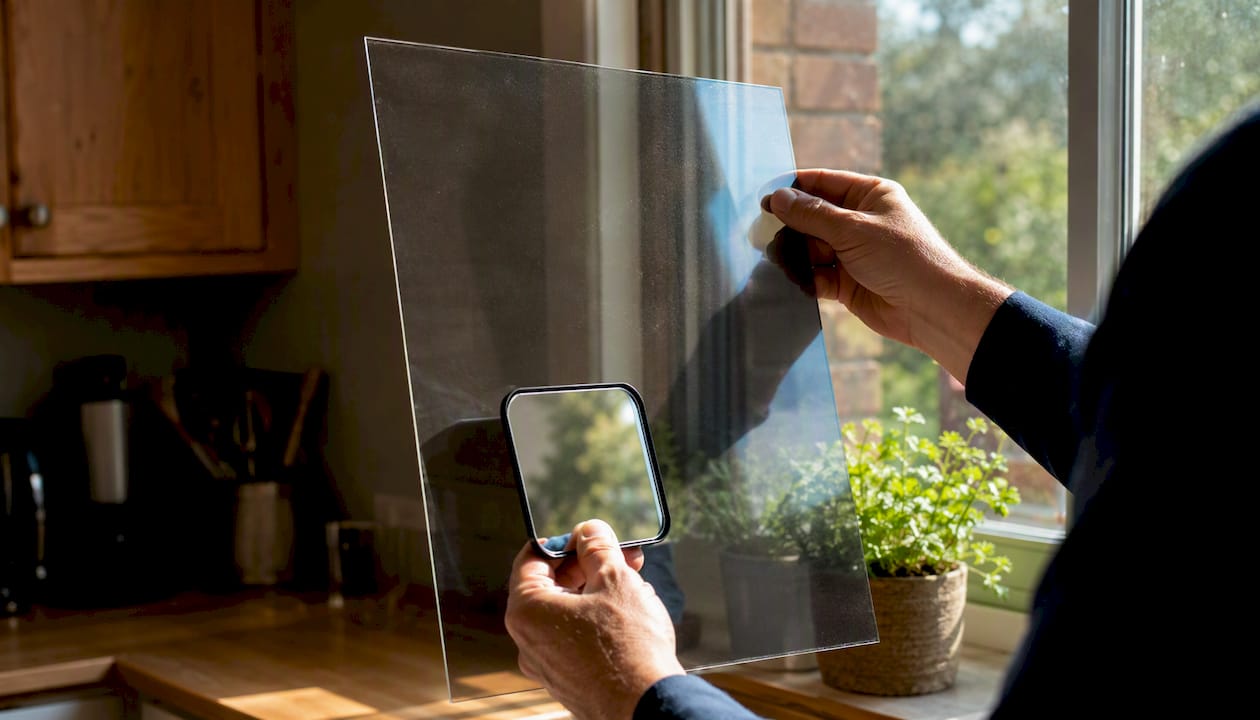
Diffusion works differently from both. A diffusing or anti-glare coating scatters incoming light so it spreads evenly across a surface rather than hitting your screen as a concentrated beam. This is why diffusing films improve screen visibility without requiring a heavy tint.
Professional multi-layer films combine all three mechanisms in a single construction. A ceramic or nano-ceramic top layer handles heat rejection without the metallic mirror effect; a dye layer manages residual brightness; and an optical diffusion coat reduces harsh reflections. The result is better glare control and better optical clarity than any single-mechanism retail film can deliver.
Professional-grade multi-layer films can reduce glare by up to 90%, significantly outperforming standard retail options.
What type of anti-glare window film should you choose?
Each film category solves a slightly different problem. Here is what actually matters for each one.
Ceramic and multi-layer films are the top pick for home offices, monitor walls, and any room where screen clarity matters. They reject heat without a reflective exterior look, maintain good optical clarity, and hold up for 10–15 years with proper care. The upfront cost is higher, but the performance gap over dyed films is significant.

Metalized and reflective films deliver strong glare and heat rejection, often with total solar energy rejection rates that are typically high on exterior-applied versions. The catch is appearance: the mirror finish changes how your building looks from outside, and some metallic films can interfere with low-e coatings on IGUs.
Dyed and tinted films cost less but fade faster, typically within 5–7 years. Color shift is a real issue as the dye breaks down, and in overcast conditions a heavily tinted room can feel gloomy. Use these where darkening is acceptable and budget is the primary constraint.
Diffusing and decorative films scatter light rather than block it. They work well for privacy and for softening harsh direct sun in living rooms, but they offer limited thermal control. Do not rely on them alone for south-facing windows in summer.
Exterior vs. interior films: Exterior films intercept solar energy before it hits the glass, which maximizes heat rejection. Interior films are easier to install and replace. For IGUs (insulated glass units), interior application is usually the safer choice because exterior films on sealed double-pane units can cause thermal stress if the film is too dense.
Pro Tip: Match the film type to the room’s primary function. A home office needs ceramic or multi-layer film for clarity. A living room TV wall may do fine with a lighter dyed film if the orientation is east-facing and afternoon sun is not a factor.
Which specs matter most on a window film quote?
| Spec | What it controls | Target range for high-glare windows |
|---|---|---|
| VLT (visible light transmission) | How much daylight enters | 45% or lower for south/west; higher for east/north |
| TSER / SHGC | Solar heat rejection | Higher TSER (lower SHGC) = less heat |
| Glare reduction % | Perceived eye comfort at screens | up to 90% glare reduction with professional-grade films |
| UV blocking | Furnishing and skin protection | 95% or higher |
| Haze / optical clarity | Screen and view distortion | Lower haze = sharper image |
VLT is the number most people focus on, and rightly so. Dropping VLT to 45% or below provides meaningful glare mitigation on south and west exposures, though it will noticeably darken the room. Some films go as low as 8–9% VLT for extreme conditions like west-facing glass walls in commercial spaces.
TSER and SHGC measure the same thing from opposite directions. High TSER (say, 70%+) means the film rejects most incoming solar energy, which reduces both heat and the hotspot effect that makes glare worse. Advanced glazing solutions like Cardinal Glass’s LoĒ³-340+ demonstrate that blocking a large portion of solar heat while keeping roughly 39% visible light is achievable with the right coating technology.
UV blocking at 95% or higher protects flooring, furniture, and artwork from fading. Some retail films, like Gila’s Glare Control Smoke, advertise up to 98% UV blocking alongside 80% glare reduction, which shows the category benchmark.
Haze is the one spec most buyers ignore. A high-haze film introduces optical distortion that makes text on a monitor look soft. For screen-heavy rooms, ask for the haze percentage explicitly and keep it as low as possible.
How do you pick the right film for your room and window orientation?
Start with a simple checklist before requesting a quote.
- Primary goal: Is it screen glare, heat, UV protection, or privacy? Rank them.
- Daylight preference: Are you willing to darken the room, or does natural light matter to you?
- View retention: Do you want to see outside clearly, or is privacy more important?
- Budget: Ceramic films cost more upfront; dyed films cost less but need replacing sooner.
- Warranty expectations: Professional installs typically carry longer material and workmanship warranties.
Orientation-based guidance:
| Window orientation | Sun exposure | Recommended VLT | Recommended TSER |
|---|---|---|---|
| South-facing | High all day | 35–45% | 70%+ |
| West-facing | Intense afternoon | 35–45% | 70%+ |
| East-facing | Morning only | 45–60% | 50–60% |
| North-facing | Minimal direct sun | 55–70% | 40–55% |
Room-specific recommendations:
- Home office / monitor wall: Ceramic or multi-layer film, VLT 40–50%, low haze. Prioritize optical clarity over maximum tint.
- TV room: A lighter dyed or ceramic film at VLT 45–55% works if the room is east-facing. Go lower on west-facing walls.
- Bedroom: Moderate VLT (50–60%) unless afternoon sun is severe. Privacy film doubles as glare control here.
- Conference room: Ceramic film, VLT 35–45%, high TSER. Occupants need to see presentation screens clearly regardless of sun angle.
The most effective glare control accounts for each window’s solar orientation and the room’s intended use, which is exactly why installers recommend different film densities per elevation rather than one spec for the whole building.
DIY film or professional installation: which one is right for you?
Pros of DIY:
- Lower upfront cost
- Available at hardware stores without scheduling
Cons of DIY:
- Bubbles, creases, and edge lifting are common without professional tools
- Retail films rarely match professional-grade optical clarity
- No warranty on workmanship; material warranties are often voided by improper application
- Risk of thermal stress on IGUs if the wrong film density is chosen
Pros of professional installation:
- Correct film selected for each window’s orientation and glass type
- Installers use light meters and glass gauges to prevent thermal stress breakage
- Workmanship and material warranties typically included
- Longer film lifespan (10–15 years vs. 3–7 for DIY retail films)
Cons of professional installation:
- Higher upfront cost
- Requires scheduling and lead time
Typical professional installation process:
- On-site assessment: installer measures windows, checks glass type, and reads solar exposure with a light meter
- Film selection: VLT, TSER, and haze specs are matched to each elevation
- Surface preparation: glass is cleaned and any existing coatings are checked for compatibility
- Film application: cut to size, applied with slip solution, squeegeed flat, edges sealed
- Curing period: 2–4 weeks for adhesive to fully bond (varies by film and climate)
Pro Tip: Always ask for a written warranty that covers both the film material and the workmanship separately. A material warranty alone does not protect you if the installer’s application causes edge peeling or seal failure on a double-pane unit.
Real results from Omaha Window Tinting
The pattern Tintadvantage sees repeatedly is straightforward: a home or office with south- or west-facing glass, persistent screen glare, and occupants who have tried blinds and found them unsatisfactory. After a ceramic or multi-layer film installation, screen reflections drop sharply, the room stays usable throughout the afternoon, and cooling loads decrease.
Expected outcomes after a professional installation with Tintadvantage:
- Significant reduction in screen-reflective glare, typically within the first day
- Preserved natural daylight at the chosen VLT level
- UV protection at 95% or higher, reducing furniture and flooring fade
- Measurable reduction in cooling load, with some clients reporting lower cooling costs after solar film upgrades
- A cleaner, more uniform window appearance compared with blinds or shades
Professional films from Tintadvantage can reduce glare by up to 90%, which translates directly to less eye strain during long work sessions and more usable afternoon hours in rooms that were previously unusable.
How to care for your window film after installation
Cleaning best practices:
- Use a soft microfiber cloth and a mild, ammonia-free cleaner
- Avoid abrasive pads, squeegees with metal edges, or any solvent-based spray
- Wipe gently in straight strokes rather than circular scrubbing
What to expect during curing:
- Minor edge moisture or small water pockets are normal in the first 2–4 weeks
- Avoid touching, peeling, or cleaning the film during the curing window
- Do not apply tape or stickers to the film surface during this period
- After curing, the film should appear flat and clear with no visible bubbles
Troubleshooting common issues:
- Small bubbles after curing: Call your installer. Persistent bubbles after 4 weeks indicate an application issue covered by workmanship warranty.
- Peeling edges: Usually caused by cleaning with ammonia-based products or by mechanical contact. Check your warranty terms.
- Optical distortion: If the film looks wavy or distorted after curing, the film may have been applied to an incompatible glass type. Contact the installer immediately.
Maintenance schedule:
- Monthly: quick wipe with a damp microfiber cloth
- Annually: full inspection of edges, corners, and any areas near window hardware
What does professional installation typically cost?
Professional window film installation in the United States generally runs between $5 and $15 per square foot for residential work, depending on film type, window size, and complexity. Ceramic and multi-layer films tend to be more expensive, while dyed films cost less. Installation costs vary widely based on window size and project scope.
Timeline is usually short. A single-window job takes an hour or two. A full residential project covering 10–15 windows typically wraps in one day. Commercial jobs with large glass facades or multiple floors may require 2–3 days and a longer scheduling lead time. Most installers can provide a written quote within a few days of an on-site assessment.
What are the real drawbacks of window film?
No film is perfect, and knowing the limitations upfront prevents disappointment.
Color shift is the most common complaint with dyed films. As the dye layer degrades over years of UV exposure, the film can take on a purple or brownish tint. Ceramic films are far more stable, but they cost more.
Reduced visibility in low light is a trade-off that comes with any film below about 40% VLT. In overcast conditions or at night, a heavily tinted window can make a room feel closed in. This matters more in northern climates with limited winter sun.
Exterior appearance changes are unavoidable with reflective or metalized films. Some HOAs restrict mirror-finish films, so check your community rules before committing.
Incompatibility with some glass types is a real risk, particularly on older single-pane glass or specialty coatings. Applying too dense a film to a sealed IGU can cause thermal stress and crack the glass. This is one of the strongest arguments for professional assessment over DIY.
No film lasts forever. Even high-quality ceramic films have a finite lifespan, typically 10–15 years. Budget for eventual replacement.
Does window film work on all glass types?
Most interior window films are compatible with standard single-pane and double-pane clear glass. The complications arise with specialty glass.
Low-e coated glass already has a solar-control coating. Adding a film on top can trap heat between layers and cause thermal stress. A professional installer will test the existing coating before recommending a film.
Tempered glass accepts most films without issue, but the film must be sized and applied carefully to avoid edge stress.
Laminated glass is generally compatible with interior films and is often used in safety applications alongside security film.
Older single-pane glass is the most forgiving substrate for film application, but it also has the least insulating value, so the energy benefit of the film is more pronounced here.
Tinted factory glass already reduces some solar gain. Adding a film on top can push the glass into thermal stress territory, particularly on south-facing IGUs. Always disclose existing glass tints to your installer.
Energy savings that go beyond glare control
Glare reduction is the visible benefit, but the energy impact is often what surprises homeowners most. A film with high TSER blocks a significant portion of solar heat before it enters the room, which reduces the load on your air conditioning system. Some Tintadvantage clients have reported noticeable cooling cost reductions after solar film upgrades, particularly in homes with large south- or west-facing glass.
UV protection at 95%+ also extends the life of flooring, furniture, and artwork, which is a real financial benefit even if it does not show up on an energy bill. Fading from UV exposure is cumulative and largely irreversible, so the film pays for itself partly in avoided replacement costs.
In winter, some films provide a modest insulating effect by reducing radiant heat loss through the glass, though this benefit is secondary to the summer cooling savings for most U.S. climates.
Key Takeaways
Professionally installed ceramic or multi-layer glare reduction window film is the most reliable way to cut screen glare, preserve daylight, and lower cooling costs without sacrificing your view.
| Point | Details |
|---|---|
| Best film type for screens | Ceramic or multi-layer film offers the best balance of glare control, optical clarity, and durability. |
| VLT guideline | Choose 45% VLT or lower for south- and west-facing windows; higher VLT suits east- and north-facing glass. |
| Orientation matters | West- and south-facing windows need higher TSER and lower VLT to handle peak afternoon sun. |
| Pro install vs. DIY | Professional installation includes light-meter assessment, warranty coverage, and correct film selection for your glass type. |
| Tintadvantage | Tintadvantage provides on-site assessment, ceramic and multi-layer film installation, and documented energy and glare-reduction outcomes for residential and commercial properties. |
Why I always recommend starting with the window, not the film
Most people walk into a glare problem and immediately start shopping for a product. That instinct makes sense, but it gets the order wrong. The film is almost secondary. What actually determines whether you solve the problem is understanding the window first: its orientation, its glass construction, its existing coatings, and how much daylight the room genuinely needs.
The conventional wisdom says “get a darker film for more glare control.” That is true as far as it goes, but it misses the point that a film too dark for a north-facing bedroom creates a different problem than the one it solved. The real skill is matching the spec to the window, not just buying the most aggressive film available.
Ceramic and multi-layer films earn their higher price not because of marketing but because they maintain optical clarity at lower VLT levels. You get meaningful glare control without the room feeling like a cave. For anyone spending hours in front of a monitor, that distinction is worth paying for. And for anyone unsure where to start, an on-site assessment from a qualified installer is genuinely the most efficient first step, not a sales tactic.
Tintadvantage can assess your windows and install the right film

Tintadvantage handles the full process for homeowners and businesses in the Omaha area: on-site light assessment, film selection matched to each window’s orientation and glass type, professional installation, and written warranty coverage for both materials and workmanship. The consultation includes VLT and TSER recommendations per elevation, so you know exactly what you are getting before any film goes on the glass.
Services include glare-reduction film, heat and solar control film, UV protection upgrades, privacy film, and commercial installations for offices and multi-tenant properties. Most residential projects are completed in a single day.
To get a written quote and schedule your on-site assessment, contact Tintadvantage directly. The assessment is the fastest way to know which film solves your specific glare problem without guessing at specs online.
Useful sources and further reading
The claims in this article draw from manufacturer technical pages, industry glazing guides, and Tintadvantage’s installation experience. For deeper technical reading:
- Glare Control — Concord Window Film: practical overview of glare-control film benefits for residential use
- Glass for Glare Control — Guardian Glass: authoritative manufacturer guidance on VLT, orientation, and glare-control glazing principles
- LoĒ³-340+ — Cardinal Glass Industries: technical data on advanced solar-control coatings balancing heat rejection and daylight
- Sentinel Plus Exterior Film — Solar Gard: exterior film performance data including TSER figures
- Home Window Glare Reduction — 3M United States: consumer-facing guidance on matching film to room and orientation
- How Does Window Film Reduce Glare? — Tintfit Window Films: explanation of glare-reduction mechanisms and performance benchmarks
- Tintadvantage — Omaha Window Tinting: local professional installation services, consultation booking, and residential and commercial film options
For product-level decisions, an on-site assessment from a qualified installer will always be more accurate than selecting a film based on online specs alone.