Window Film for Patio Doors: What Actually Works
Ceramic solar-control film is the best all-around choice for most patio doors. For installation, the right call depends on your door: if you have a standard 6’0" x 6’8" sliding door, a pre-cut patio door kit is a legitimate DIY option. For anything custom-sized, tinted glass, or if you simply want a flawless finish with a warranty, hire a professional.
- Heat and UV: High-performance ceramic films hit roughly 80–82% solar heat reduction and up to 99% UV blocking, protecting both your comfort and your furniture.
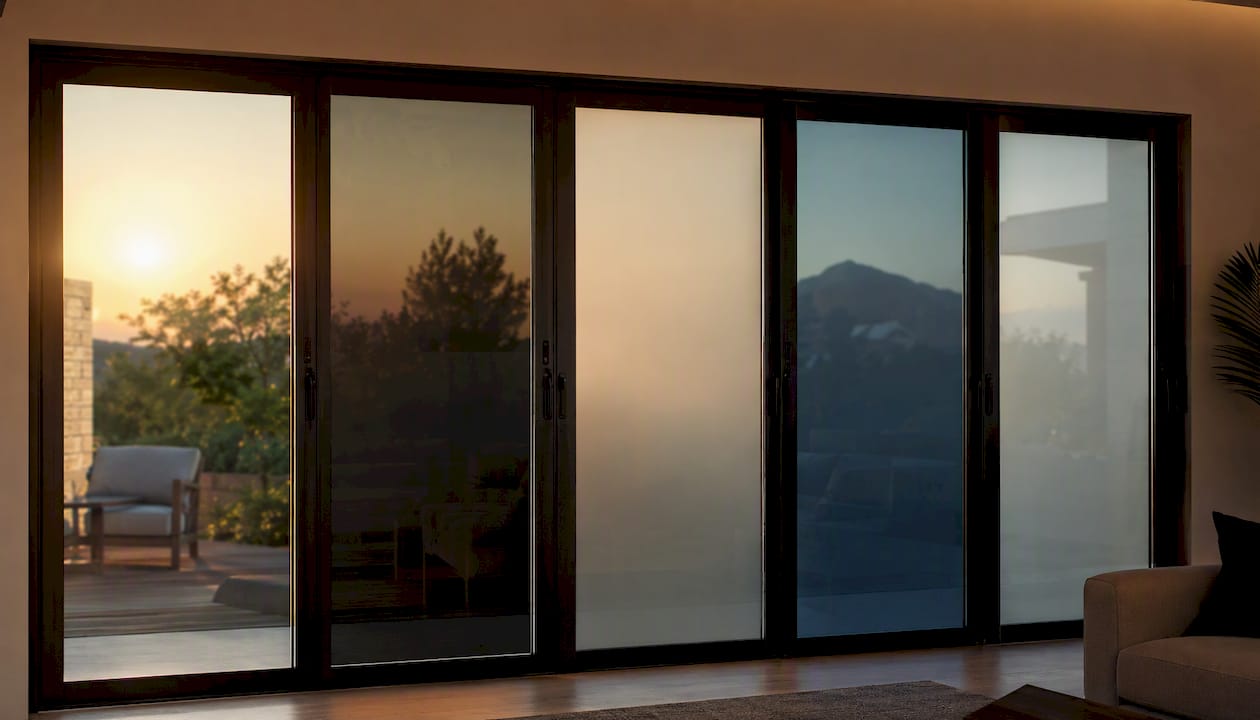
- Privacy: Reflective films give you daytime privacy only. Once the sun goes down and your interior lights come on, the mirror effect reverses. For true 24-hour privacy, you need frosted or opaque film.
Pro Tip: If your patio door faces west or southwest, heat rejection matters more than aesthetics. A ceramic film with a high TSER rating will do more for your comfort than a decorative frosted option.
Key Takeaways
Ceramic solar-control film with professional installation is the most reliable long-term solution for patio doors facing heat, UV, or glare problems.
| Point | Details |
|---|---|
| Best film type | Ceramic solar-control film hits up to 80–82% heat rejection and 99% UV blocking with minimal view distortion. |
| Privacy caveat | Reflective films provide daytime-only privacy; frosted or opaque film is required for true 24-hour coverage. |
| DIY kit sizing | Standard pre-cut kits ship as two 36" x 76" panels, sized for a 6’0" x 6’8" sliding door. |
| Ask before buying | Always confirm TSER, VLT, UV%, adhesive type, film thickness, and warranty terms before committing. |
| Tintadvantage | Tintadvantage offers professional ceramic film installation with a workmanship warranty and free in-home measurement in the Omaha area. |
Table of Contents
- What type of patio door window film should you choose?
- What does window film actually do for your patio door?
- DIY pre-cut kit or professional install — which is right for you?
- How to pick the right film and what to ask before you buy
- How to install a pre-cut patio door kit
- Why Omaha Window Tinting delivers results DIY kits cannot
- What most homeowners get wrong about patio door film
- Tintadvantage can handle your patio door the right way
- Sources
What type of patio door window film should you choose?
The film category you pick determines everything downstream: how much heat it blocks, whether you can still see outside, and whether your privacy holds after dark. Here is how each type plays out on a patio or sliding glass door.
| Film Type | Primary Benefit | Privacy Level | View Retention | Best Use Case |
|---|---|---|---|---|
| Ceramic solar-control | Heat + UV rejection | Low to moderate | Excellent | West/south-facing sliders |
| Reflective/metalized | Heat + daytime privacy | Daytime only | Good from inside | Sun-heavy rooms, street-facing doors |
| Frosted/opaque/decorative | 24-hour privacy | Full | None to low | Bedrooms, bathrooms, street-level patios |
| Dyed | Glare reduction | Low | Good | Budget installs, low-sun exposures |
| Safety/security | Impact resistance | None | Full | Doors near high-traffic or storm zones |
| Switchable (smart film) | On-demand privacy | Switchable | Full when clear | High-end installs, home offices |
A few practical notes for patio doors specifically. Reflective films work well on a sun-drenched living room slider, but the daytime-only privacy limitation catches a lot of homeowners off guard. The one-way mirror effect flips at night when your interior is brighter than the outside. Frosted or opaque film solves that completely, but you trade the view for it permanently.
Dyed films are the entry-level option. They cut glare and add some privacy, but they fade faster than ceramic or metalized films and offer less heat rejection. Safety film is worth considering if your patio door is near a play area or in a region prone to severe weather. It holds shattered glass in place on impact.
Switchable smart film is the premium end of the spectrum. A switch or app toggles it between clear and opaque. The cost is significantly higher than any other category, and it typically requires professional installation.
Frosted film in that same room would eliminate the glare but also the natural light.
What does window film actually do for your patio door?
The performance of any solar-control film comes down to three numbers: TSER, VLT, and UV blocking percentage. Understanding what each one means makes it much easier to compare products and avoid being misled by vague marketing claims.
Total Solar Energy Rejected (TSER) measures the percentage of total solar energy a film keeps out, combining heat, UV, and visible light. High-performance ceramic solar-control films commonly reach TSER figures near 80%, which is why they dominate the professional market.
Visible Light Transmission (VLT) is the percentage of visible light that passes through. A 70 VLT film lets in most of the daylight and feels nearly invisible. A 15 VLT film is quite dark. Most homeowners land in the 35–55 VLT range for patio doors, which balances natural light with meaningful heat control.
UV blocking is where the numbers get impressive. Specialist suppliers report that ceramic and solar-control films commonly advertise TSER near 80% and UV blocking up to 99% for high-performance products. That matters because UV radiation is the primary driver of furniture fading, flooring discoloration, and fabric degradation near glass doors.
High-performance solar-control films can reduce solar heat gain by roughly 80–82% and block up to 99% of UV rays, according to performance data from leading film suppliers.
The energy savings angle is real but often overstated in marketing. Reducing solar heat gain through a large patio door does lower the load on your air conditioner. That figure varies by climate, door orientation, and existing insulation. Pairing window film with other door and window energy upgrades compounds those savings further.
For UV protection specifically, the patio door UV film category is worth treating as a separate purchase decision from heat control. Some films optimize for UV blocking at the expense of TSER, and vice versa. Ceramic films tend to do both well simultaneously.
DIY pre-cut kit or professional install — which is right for you?
This is the decision most homeowners get wrong by defaulting to whichever option feels cheaper upfront. The real question is whether the risk of a poor DIY result on a large glass panel is worth the savings.
What DIY pre-cut kits offer
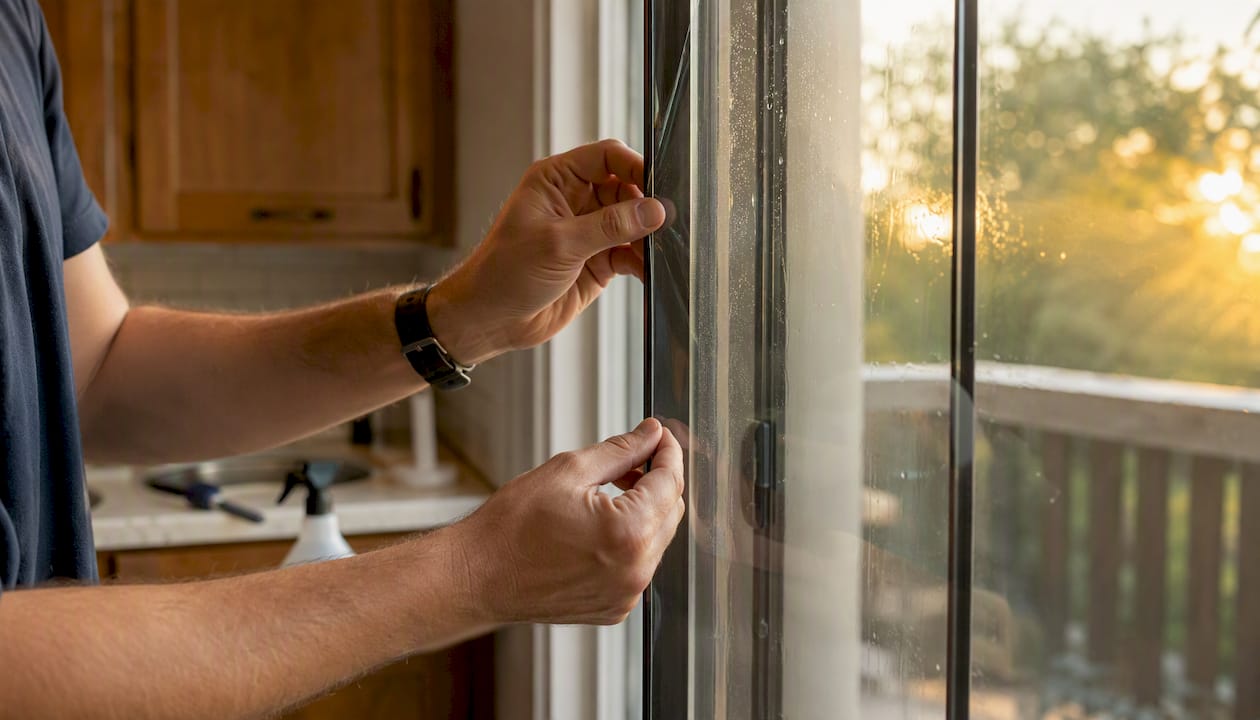
Pre-cut kits are sized for standard doors. The most common format ships as two panels at 36" x 76" to fit a standard 6’0" x 6’8" sliding door, also called a 6068 door. Kit specs typically include a film thickness around 2 MIL and a dry-adhesive system that reduces the risk of the film sticking to itself mid-install. A DIY project on a standard door can often be completed in under half a day.
DIY kit advantages:
- Lower upfront cost (entry-level kits start around $99 for a standard door)
- No scheduling required; install on your own timeline
- Dry-adhesive systems on quality kits reduce creasing risk
DIY kit drawbacks:
- No warranty on workmanship; if you crease or bubble the film, you absorb the cost
- Large glass panels are unforgiving; a single squeegee error shows
- Non-standard door sizes require cutting, which adds skill and error risk
- Static-cling films, common in retail kits, are less durable on large, high-exposure doors than pressure-sensitive adhesive systems
What professional installation delivers
A professional installer measures the glass precisely, cuts film to fit, and uses tools and technique that eliminate the bubbles and edge-lifting that plague DIY installs on large panes. The finished result carries a workmanship warranty. For doors larger than standard, tinted or tempered glass, or multi-panel configurations, professional installation is the lower-risk path even when the upfront cost is higher.
Professional install advantages:
- Custom fit for any door size or configuration
- Workmanship warranty covers defects
- Proper adhesive systems and squeegee technique prevent visible defects
- Access to higher-performance film grades not sold in retail kits
Professional install drawbacks:
- Higher upfront cost than DIY kits
- Requires scheduling and a site visit
For a realistic cost picture, window tint pricing factors include glass area, film grade, and regional labor rates. DIY kits for a standard patio door typically run $50–$150 in materials. Professional installation on a residential patio door generally runs higher depending on film type and door configuration. The cure time after install is typically 3–7 days for adhesive films, during which minor haziness or small water pockets are normal and resolve on their own.
How to pick the right film and what to ask before you buy
Start with your primary problem. That single decision narrows the field faster than any spec sheet.
- Heat is your main issue: Prioritize TSER. Look for ceramic films with TSER at or above 70%. Avoid dyed films for this goal.
- Privacy is your main issue: Decide whether daytime-only privacy is acceptable. If not, skip reflective films entirely and go straight to frosted or opaque.
- UV protection is your main issue: Any film with 99% UV blocking handles this. Ceramic films typically hit that mark while keeping views clear.
- Decorative or aesthetic goal: Frosted, patterned, or etched films work here. Performance specs matter less than appearance.
- Safety concern: Look for safety/security film rated for impact resistance. This is a separate category from solar-control film.
Once you know your goal, narrow by VLT. A lower VLT means a darker film and less visible light. For a room where you want natural light, stay above 35 VLT. For maximum heat rejection with a darker appearance, 15–25 VLT films are available but will noticeably dim the space.
Questions to ask any seller or installer before committing:
- What is the TSER and VLT for this specific film?
- What percentage of UV does it block?
- Is the adhesive dry-activation, water-activated, or static cling?
- What is the film thickness in MIL?
- What warranty does the film manufacturer offer, and what does your workmanship warranty cover?
- What is the removal policy if I want to change films later?
- How long is the cure time, and what should I avoid during that window?
The shade question trips up a lot of buyers. Darker is not always better for heat rejection. Ceramic films reject heat through nano-ceramic particles rather than heavy tinting, so a relatively light ceramic film can outperform a much darker dyed film on TSER. That is the core advantage of the ceramic category.
How to install a pre-cut patio door kit
A clean install on a large glass panel is achievable, but the margin for error is smaller than on a small window. Follow these steps in order and do not rush the prep.
- Measure your door panels. Confirm each panel matches the kit dimensions before you open the packaging. Standard kits cover 36" x 76" panels. If your door differs, stop and either order a custom kit or call a professional.
- Clean the glass thoroughly. Use a razor scraper to remove any adhesive residue, paint specks, or hard water deposits. Follow with a lint-free cloth and a solution of a few drops of dish soap in water. Any debris left on the glass will show as a bump under the film.
- Prepare your application solution. Mix a small amount of dish soap with water in a spray bottle. This slip solution lets you reposition the film before it sets.
- Wet the glass generously. Spray the entire glass surface before peeling the film backing.
- Position the film. Peel the backing while keeping the adhesive side wet. Lay the film onto the glass with a small overlap on each edge for trimming.
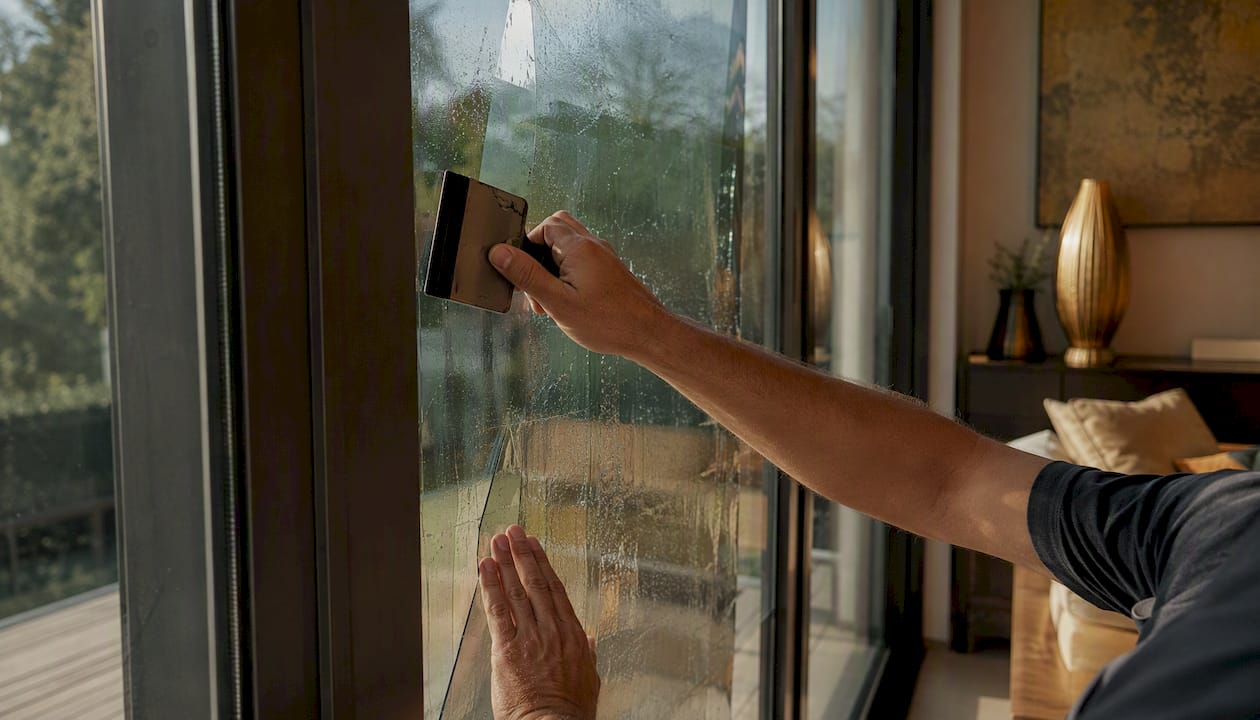
- Squeegee from the center outward. Use firm, overlapping strokes working from the middle toward the edges. This pushes water and air out rather than trapping it.
- Trim the edges. Use a fresh, sharp utility blade and a straight edge. A dull blade drags and tears the film edge.
- Allow full cure time. Most adhesive films need 3–7 days to cure completely. Small water pockets during this period are normal.
Common mistakes that ruin large-panel installs:
- Skipping the razor scraper during prep. Soap and water alone will not remove hard deposits.
- Using the same squeegee stroke direction for the whole panel. Always work center-out.
- Applying film in direct sunlight or temperatures below 40°F or above 90°F. The adhesive behaves unpredictably at temperature extremes.
- Rushing the trim before the film has settled. Wait until the film is fully positioned before cutting edges.
Pro Tip: Cut a 1/8" gap between the film edge and the door frame rather than trimming flush. This prevents edge lifting as the film expands and contracts with temperature changes.
When to call a pro instead: if your door has a gasket seal close to the glass edge, tempered or Low-E glass, or you have already attempted a DIY install that went wrong, a professional install is the faster path to a clean result.
Why Omaha Window Tinting delivers results DIY kits cannot
Tintadvantage’s process starts before the film is ever cut. A site measurement visit confirms exact glass dimensions, identifies any glass coatings that affect film compatibility, and lets the installer recommend the right film grade for the door’s orientation and the homeowner’s goals.
The installation sequence at Tintadvantage follows four steps:
- Site measurement and glass assessment to confirm sizing and identify any compatibility issues with existing coatings.
- Film selection consultation matching the homeowner’s primary goal (heat, privacy, UV, decorative) to the right ceramic or specialty film.
- Professional installation using commercial-grade tools and adhesive systems that eliminate the bubbles, creases, and edge lifting common in DIY results.
- Warranty handoff covering both the film manufacturer’s product warranty and Tintadvantage’s workmanship guarantee.
The performance outcomes back the process. Tintadvantage’s professional window film installations are associated with cooling cost reductions of 10–20% for residential clients, alongside immediate improvements in glare and comfort that homeowners notice the same day.
That kind of result is not achievable with a retail static-cling kit on a large west-facing slider. The film grade, the adhesive system, and the installation technique all contribute to a result that holds up over years rather than months.
What most homeowners get wrong about patio door film
Most guides push you toward the cheapest or most popular option without telling you the real tradeoff. Here is the honest version.
Ceramic film with professional installation is the baseline recommendation for any homeowner who plans to stay in their home for more than two or three years. The upfront cost is higher than a DIY kit, but the performance gap is real. A professionally installed ceramic film on a west-facing patio door will outperform a retail dyed or metalized kit on every metric that matters: heat rejection, UV blocking, longevity, and appearance.
DIY is reasonable when your door is a standard 6068 size, you are comfortable with the prep steps, and you are willing to accept that a large-panel install carries more risk than a small bathroom window. If those conditions hold, a quality pre-cut ceramic kit is a legitimate option.
Where I see homeowners make the costliest mistake is buying a reflective static-cling film for privacy and then discovering the nighttime reversal problem after the fact. That is a film type mismatch, not a product defect. Match the film to the actual problem first.
Tintadvantage can handle your patio door the right way
Tintadvantage specializes in residential patio door tinting across the Omaha area, with ceramic solar-control film as the core offering for homeowners dealing with heat, glare, and UV damage. Every job starts with a free in-home measurement, so the film is cut to your exact door, not a standard panel that may or may not fit.
The service includes film selection guidance, professional installation, and a workmanship warranty. Turnaround from first contact to finished install is typically fast, and the warranty covers both the film and the installation quality. If you are ready to stop fighting afternoon heat through your slider, request a free estimate and get a quote specific to your door size, orientation, and goals.
Sources
These are the primary sources used to build this guide. Each covers a specific aspect of patio door film selection, sizing, or performance.